Deep Dive Recap: Boost Productivity with Task Automation

Register for upcoming Monthly Deep Dives here.
No matter the size of your team, Tasks have the power to transform your process flow from clunky and manual to streamlined and automated. In Lawmatics, a Task is exactly what it sounds like: it is a to-do item pertaining to a particular matter that can be assigned to yourself or any other user in your organization. Every Task is created with a status, a due date, and a priority level.
Tasks are useful for your whole team to help keep matter priorities and action items organized at all times. When Tasks are well-implemented, they help ensure that nothing slips through the cracks and that all clients have a flawless experience with your firm. Not only will this lead to happier clients and more referrals, but your team will also be happier and more efficient.
From Custom Task Statuses, to automated Task Templates, to Automation Triggers based on Tasks, Lawmatics has all of the tools to keep your whole team organized and in the loop.
Tasks Overview
Creating Tasks
There are multiple different ways to go about creating Tasks in Lawmatics. In the next section we will cover how to assign tasks automatically, but first let’s focus on the manual way to create Tasks.
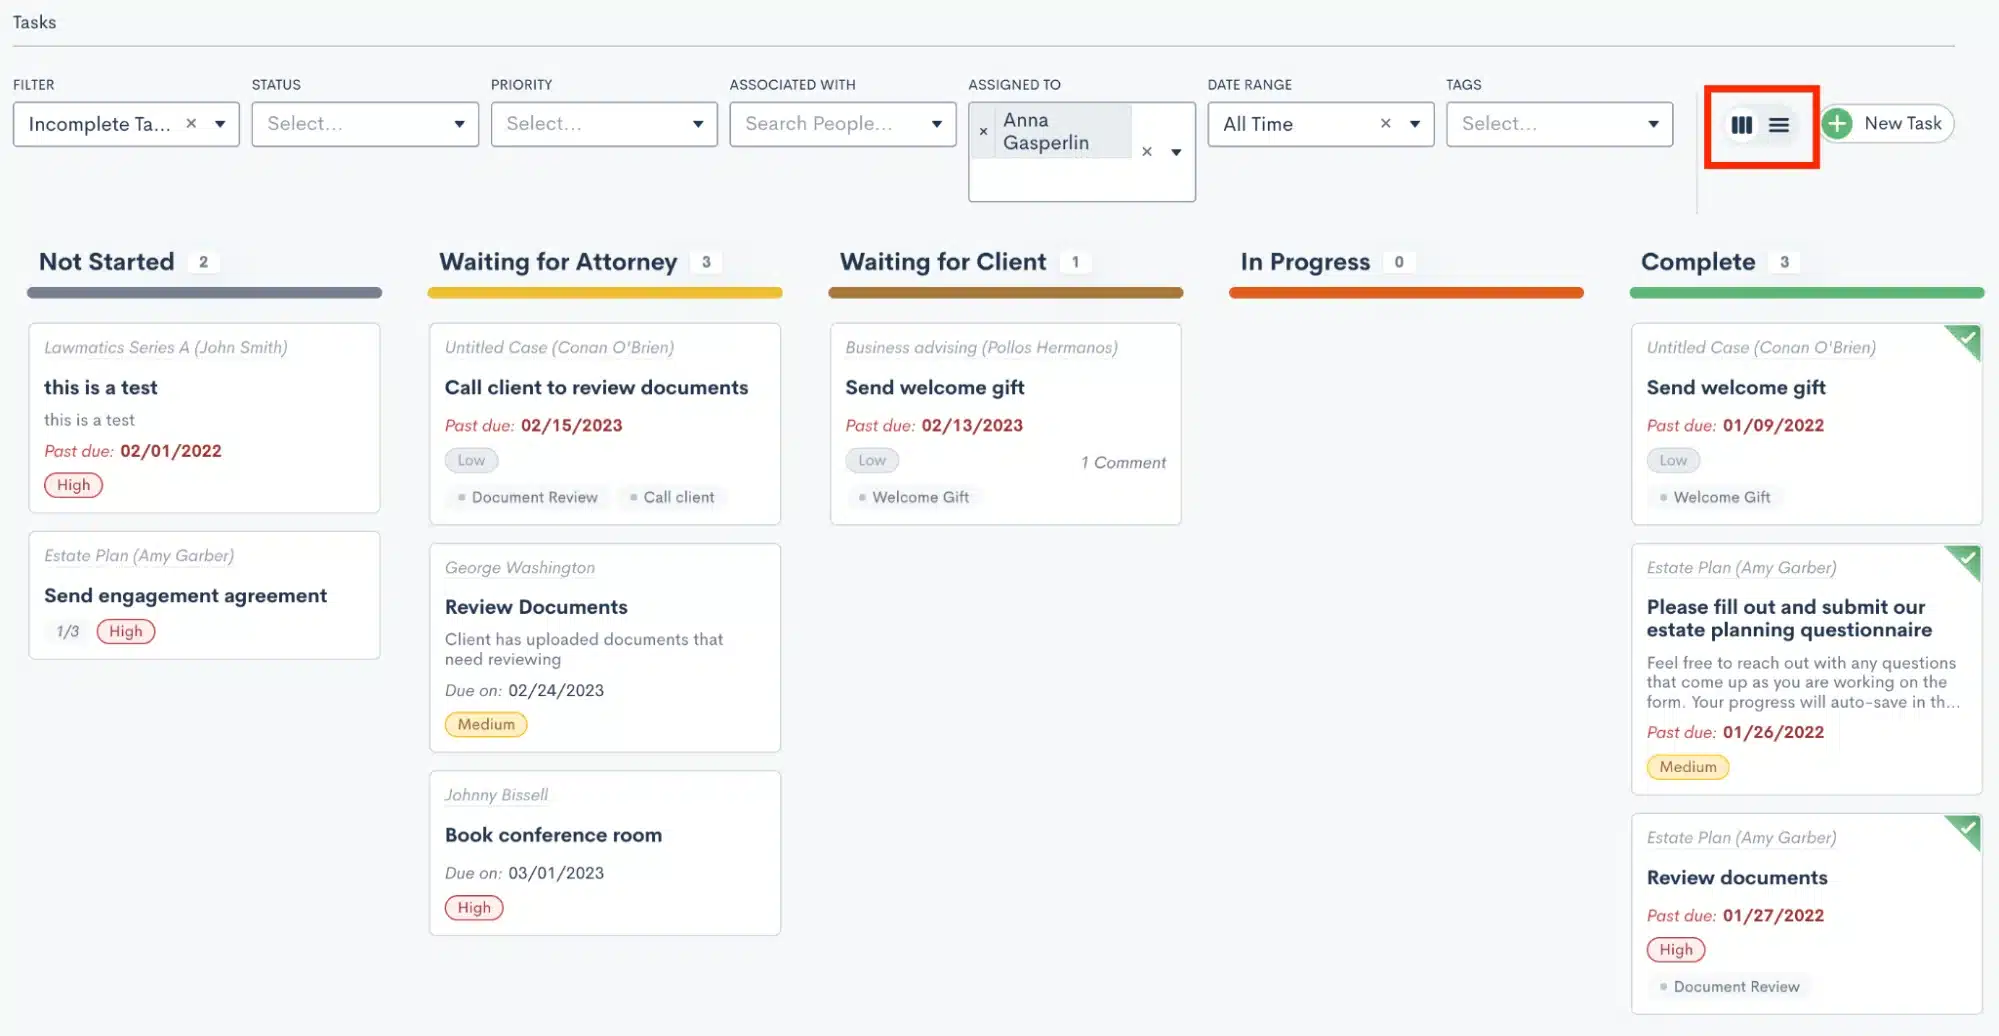
Navigate to the Tasks Dashboard by hovering over the CRM tab in the top left, and then select Tasks. Here you will see a clear overview of all of your firm’s Tasks along with filtering options to view Tasks by status, due date, user, etc. You can also toggle between the traditional list view and the Kanban view using the buttons highlighted in red below.
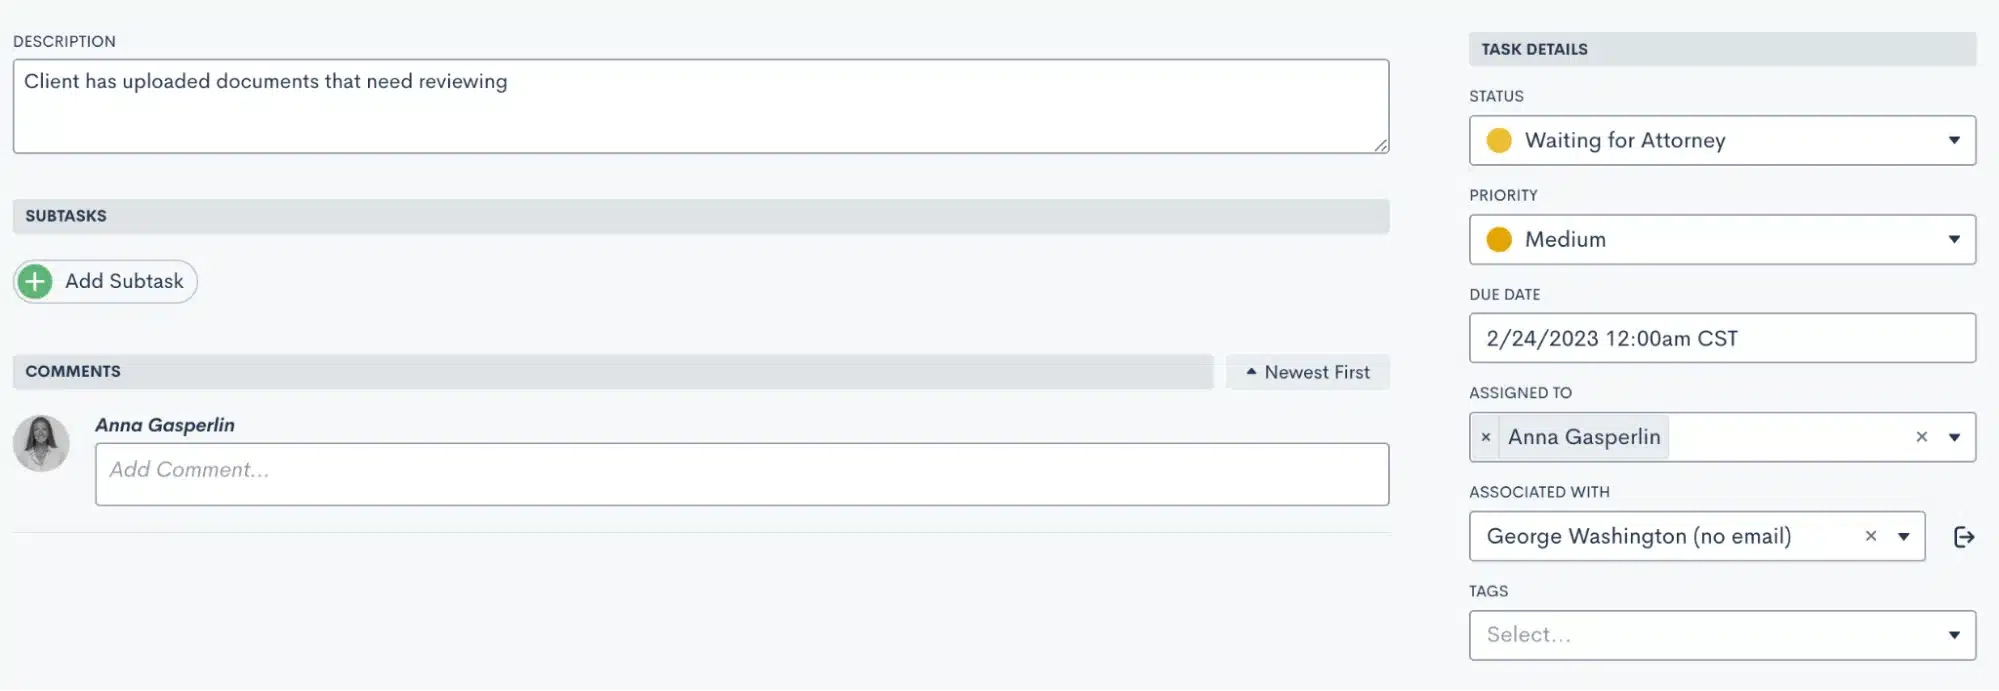
Of course in addition to viewing your Tasks, you can also create new Tasks here on this dashboard. To get started, click the New Task button in the top right corner. You will then see a new pop up that looks similar to the example shown below.
When creating the Task, make sure you give the task a name and a description, as well as the important Task details on the right sidebar menu. Also make sure to select which matter this Task is associated with when creating a task here from the dashboard.
Another way to create Tasks is directly from a matter’s profile. When creating a Task this way, you will not need to select an associated matter since it will default to the current matter. Other than that, your steps for creating the Task will be the same as shown above.
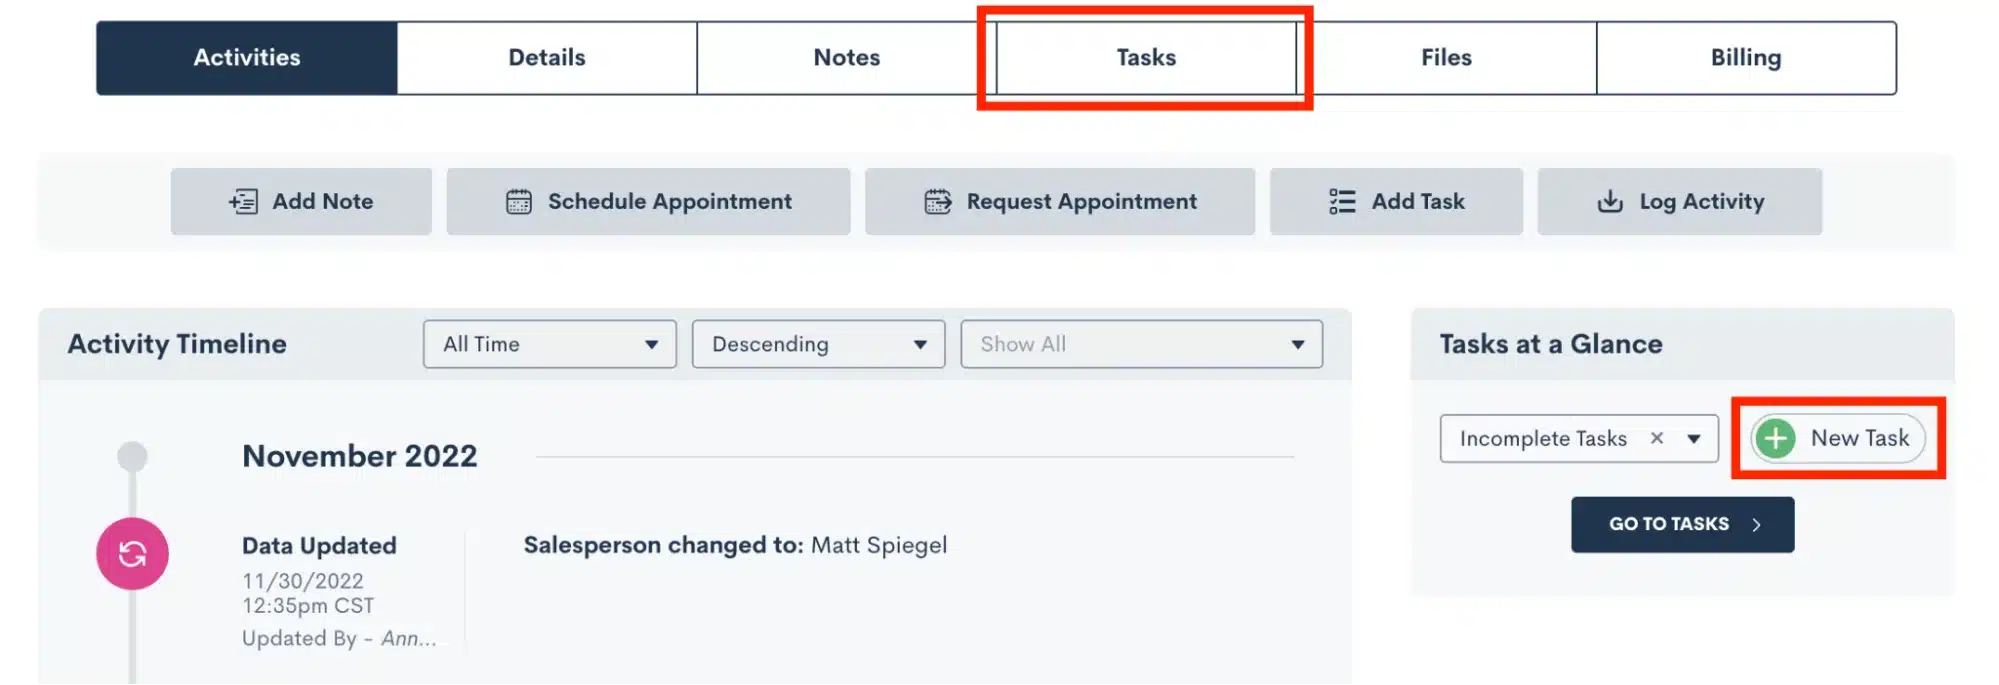
Simply select either the Tasks tab or the New Task button from the tasks sidebar on the matter’s profile.
Custom Task Statuses
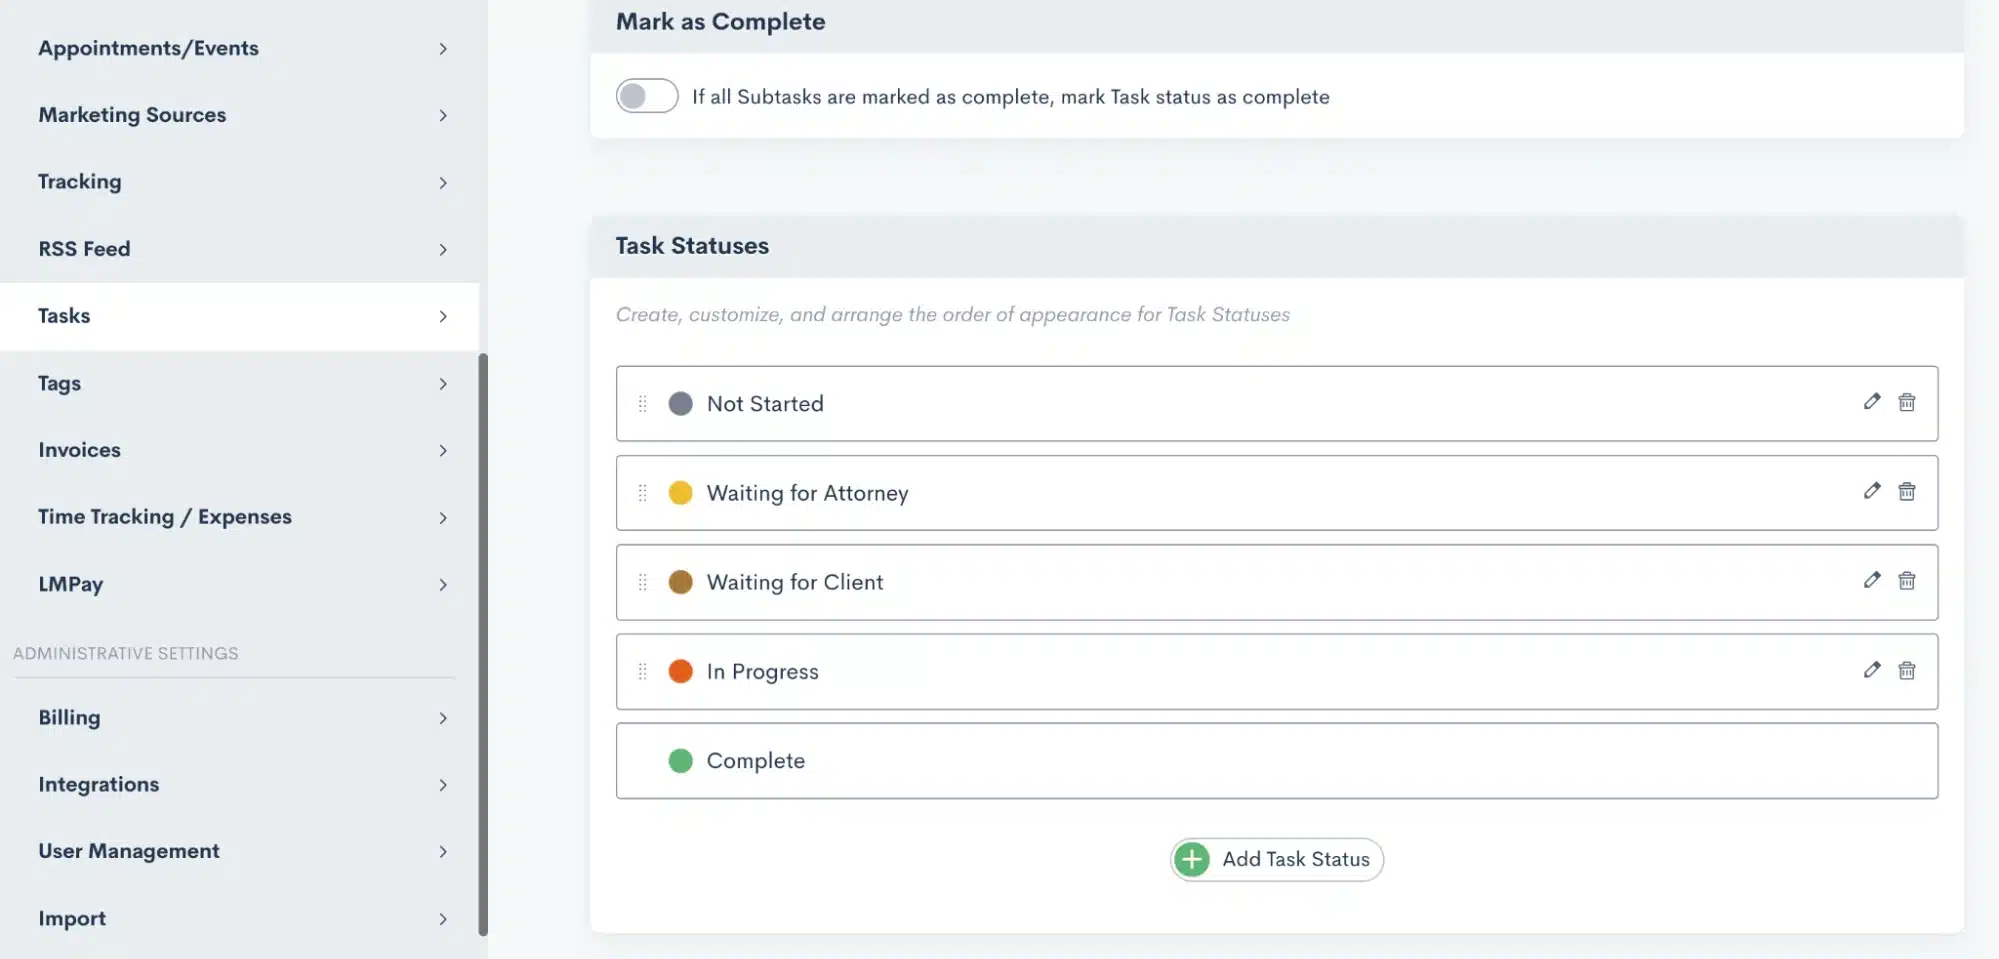
Whether you are new to Lawmatics or just starting to dive into the Tasks feature, you’ll want to make sure you have your Custom Task Statuses set up. These are created in your settings page (gear icon near the top right), and then select Tasks on the left sidebar.
Your Task statuses are custom to your firm, and are created by clicking the Add Task Status button shown at the bottom of the image below. You will also see below some sample Task Statuses that may be used for your firm. Once you have created Statuses, use the icons on the far right to edit or delete a Status as needed. Also drag and drop Statuses to rearrange their order.
If viewing the tasks dashboard with the Kanban view, each of these statuses will be the column headers. The Kanban view allows you to easily drag and drop tasks between statuses. When creating a task, you will be prompted to select the current status of that task.
Task Tags
Task Tags are used purely for automation purposes; they allow you to trigger Automations when a particular Task is either created or completed. We’ll dive more into the automation piece in the following section, but for now we’ll discuss how to create your Task Tags.
First, you can always create and edit or delete Tags by going to Settings, and then selecting Tags from the left sidebar. Note that you will also see your Contact and Matter Tags here too.
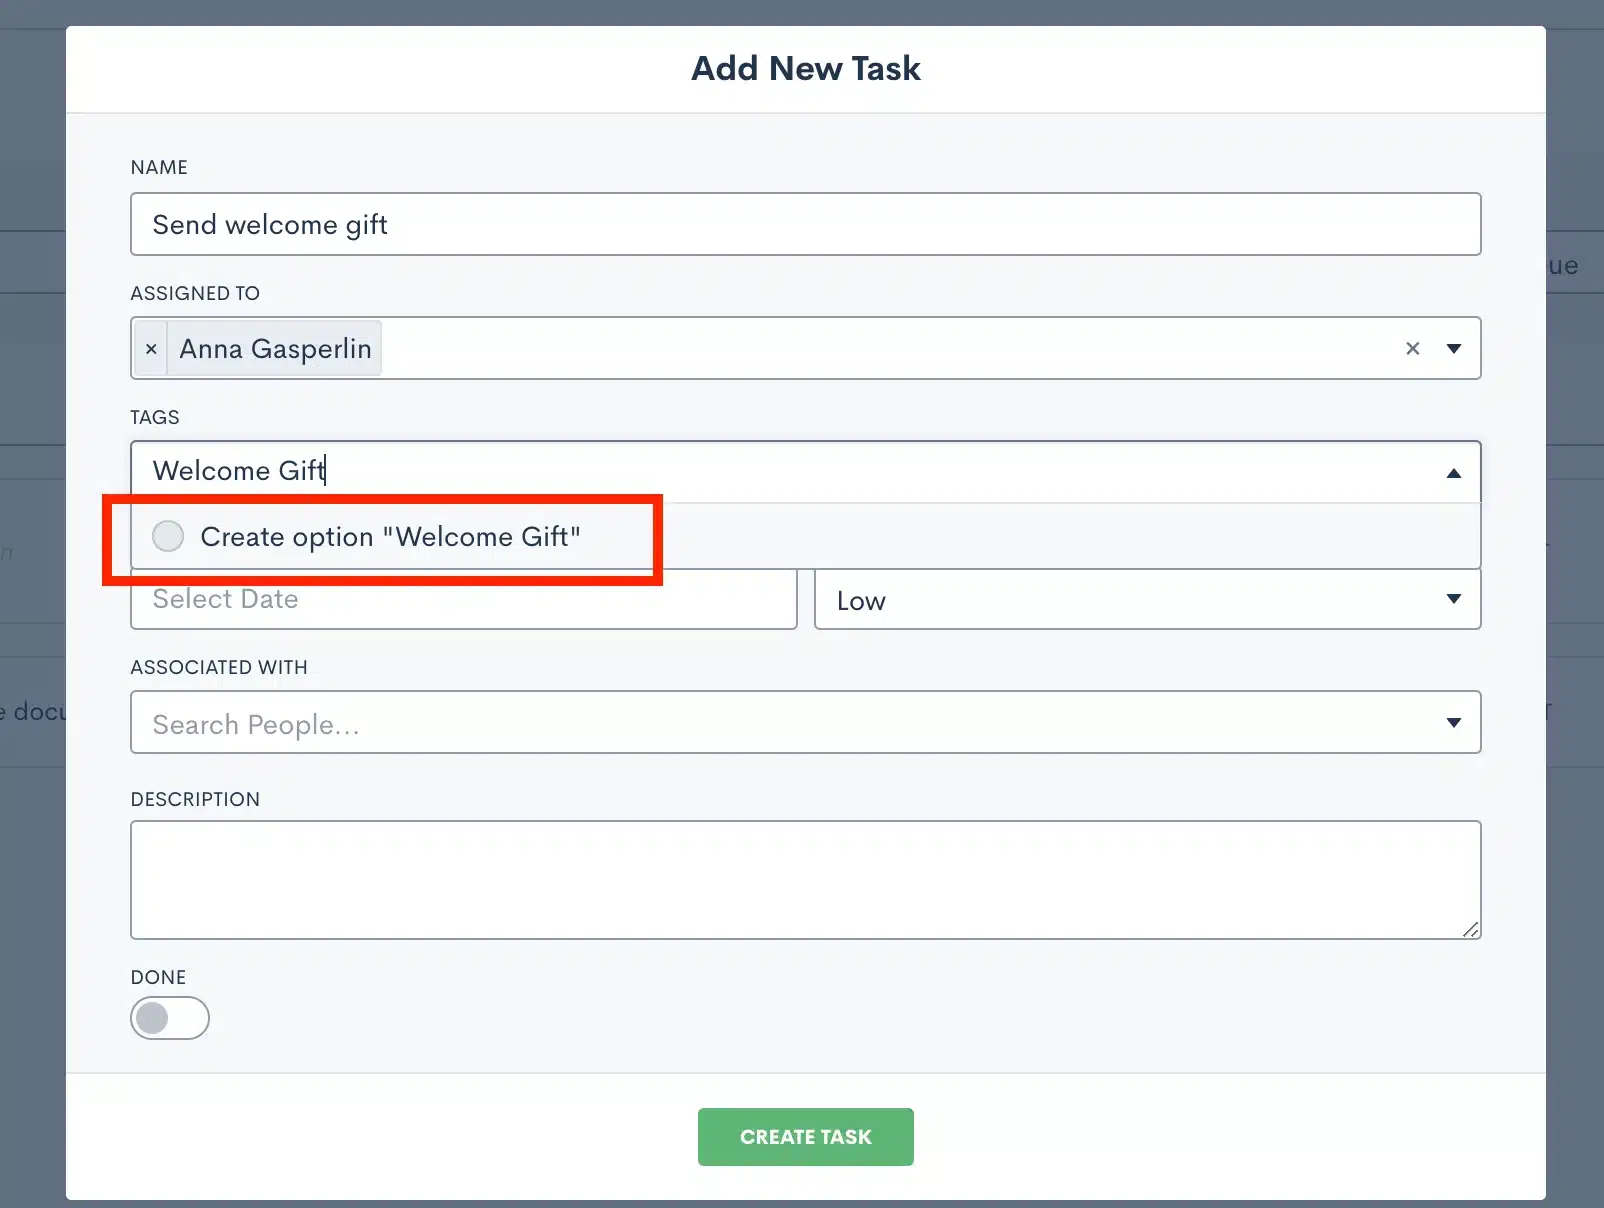
You can also create a new task tag while creating a task itself. Simply start typing the Tag (as shown below) and then select to create the new Tag as an option.
Editing and Completing Tasks
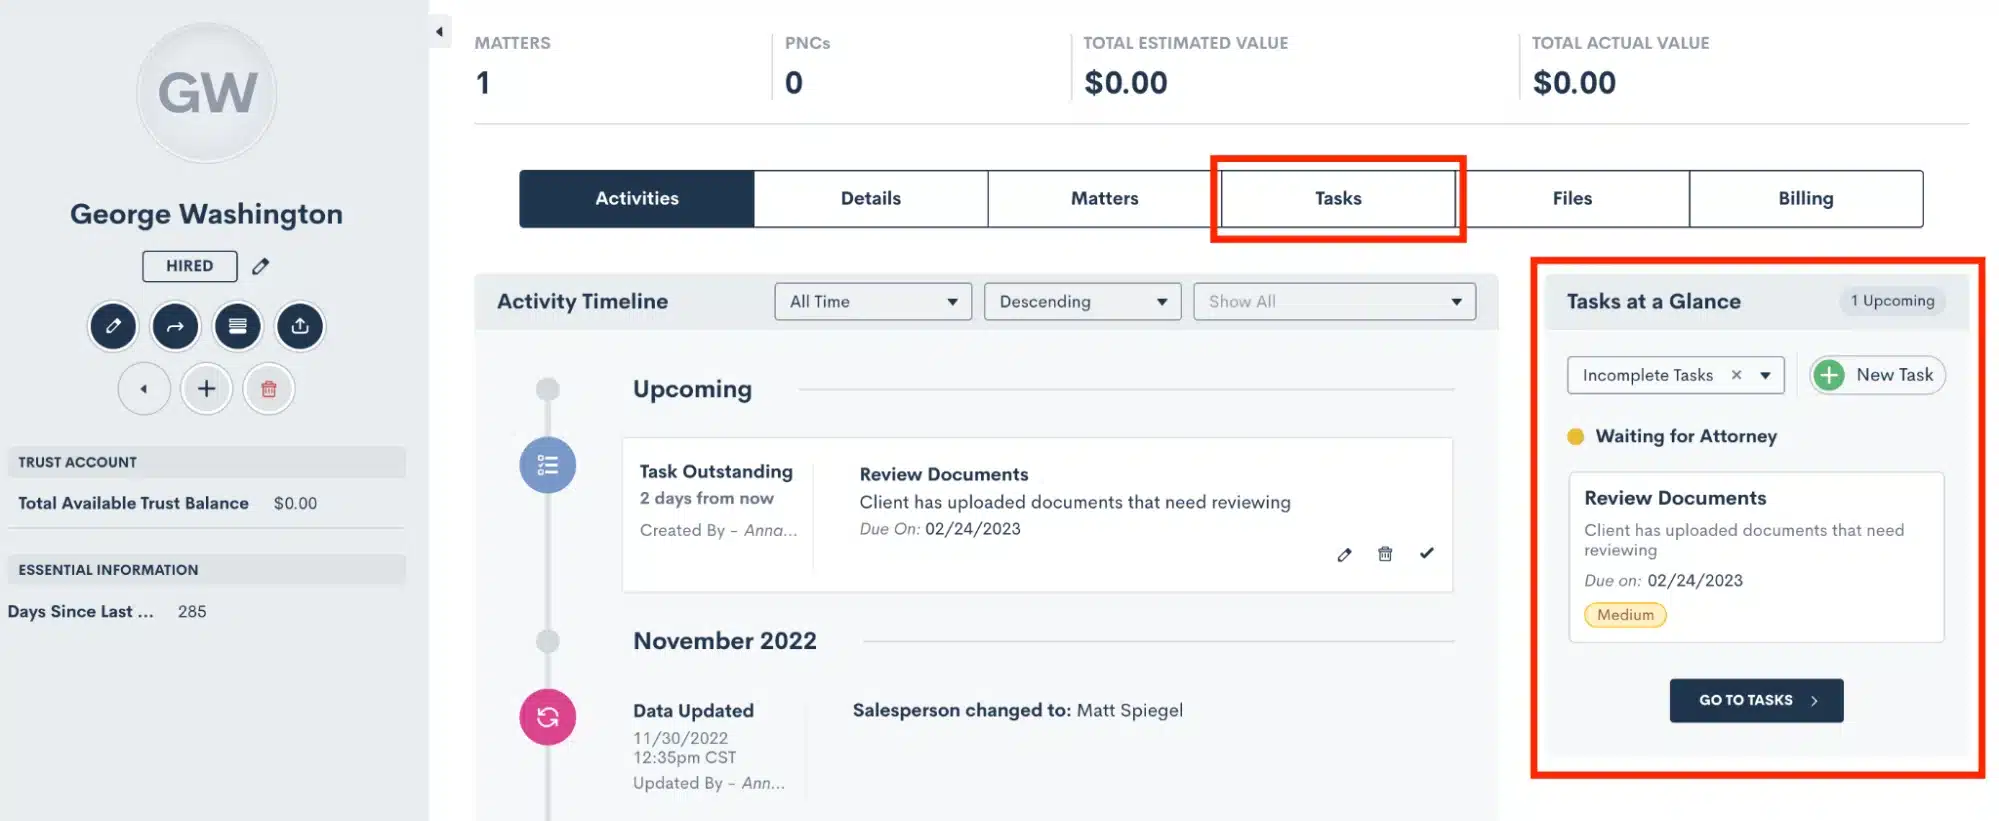
Last but not least in our Task overview, note that you can make edits to your Tasks at any time either from the Tasks Dashboard or from the associated Matter’s profile. You can also delete a Task in either of these places or mark a Task as complete.
In the image above you’ll see that you can easily access a Matter’s Tasks from either the Tasks Tab, or the Tasks at a glance sidebar. Simply click on the task in the Tasks sidebar to edit, mark as complete, comment, etc.
Task Automation
Entry Conditions
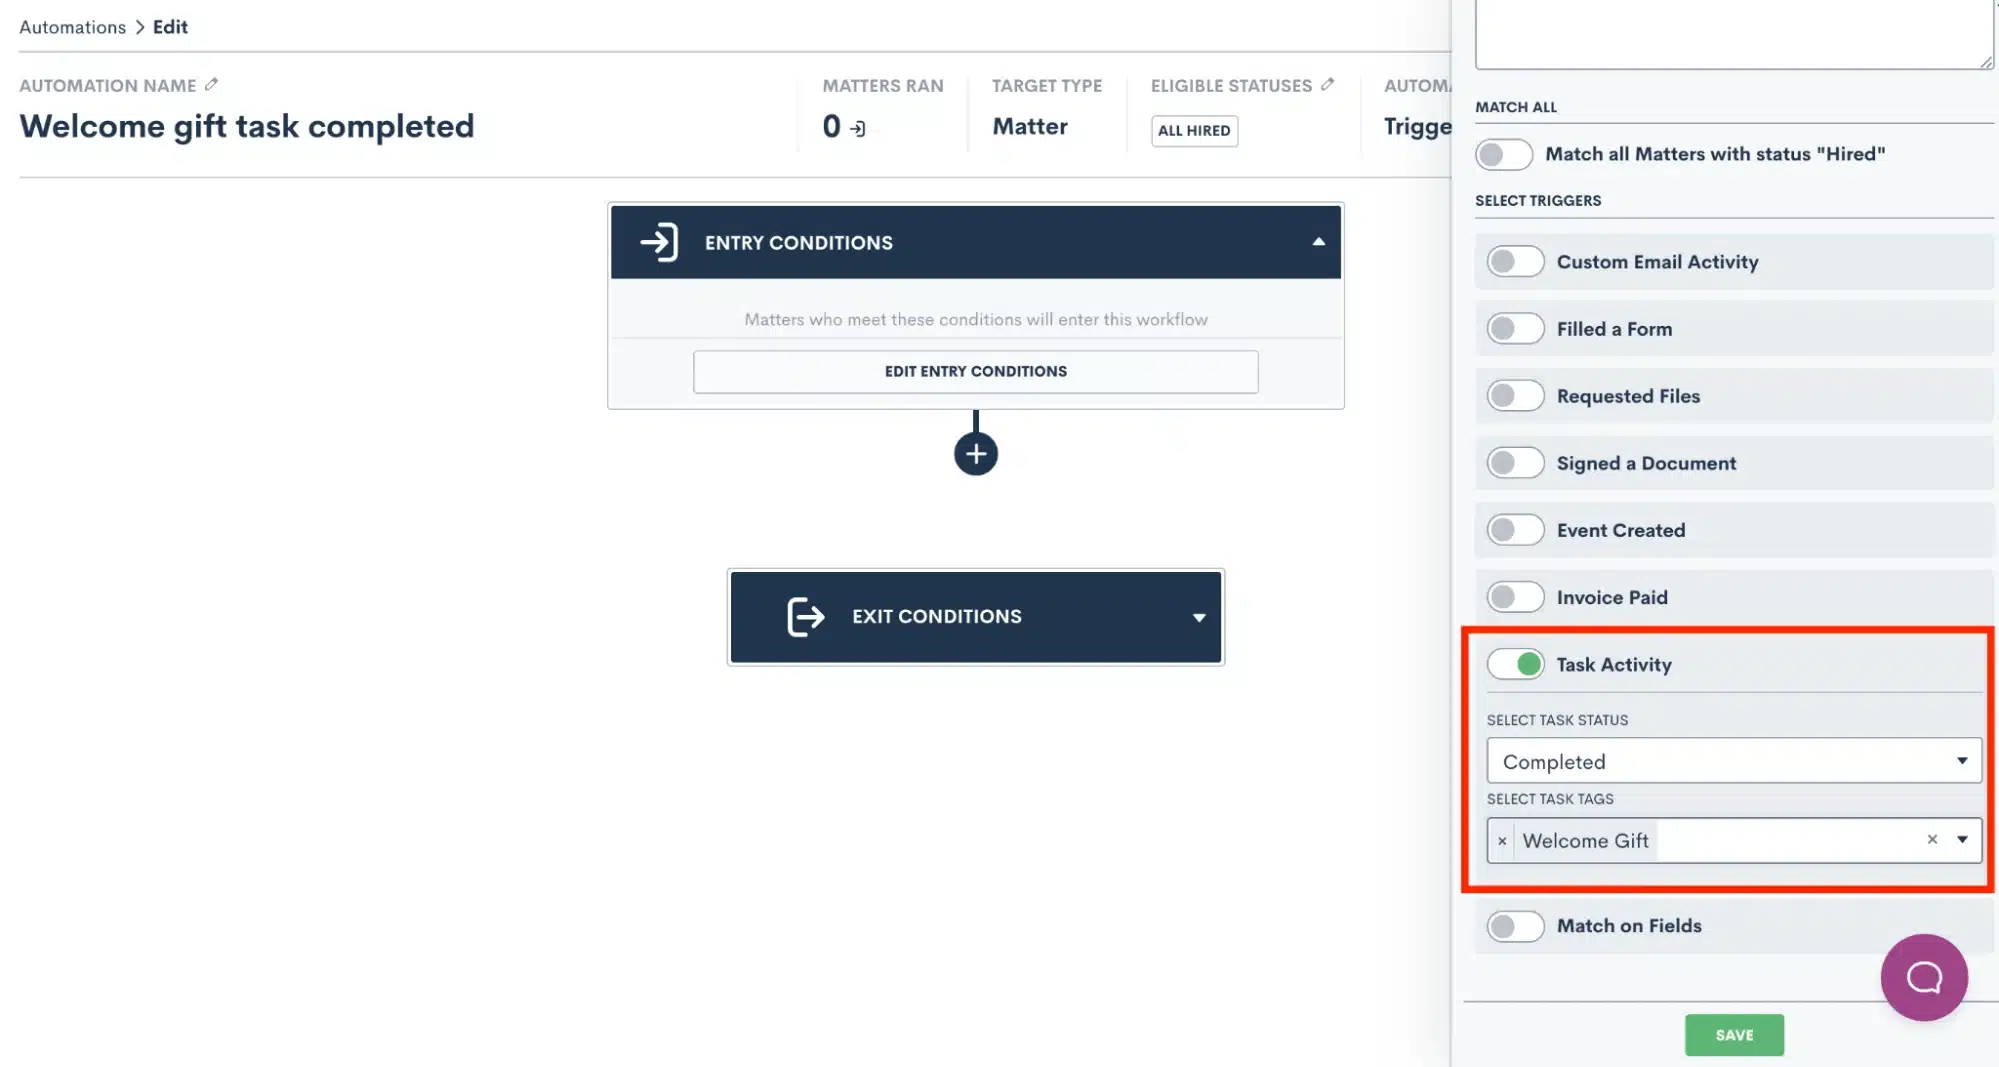
The first way to use Tasks in Automations is to trigger one with a Task. Automations can be triggered based on Task Tags, discussed above. You also have the option to trigger the Automation based on a Task of a specific Tag being either created or completed.
Note that you can use this entry condition along with any of our other entry conditions to create either an AND or an OR conditional relationship with multiple entry conditions.
It can often be powerful for your firm to trigger an Automation when a Task is completed. This may kick off another Task to be assigned automatically, or any other step that may come next in your process.
Tasks as an Action Item
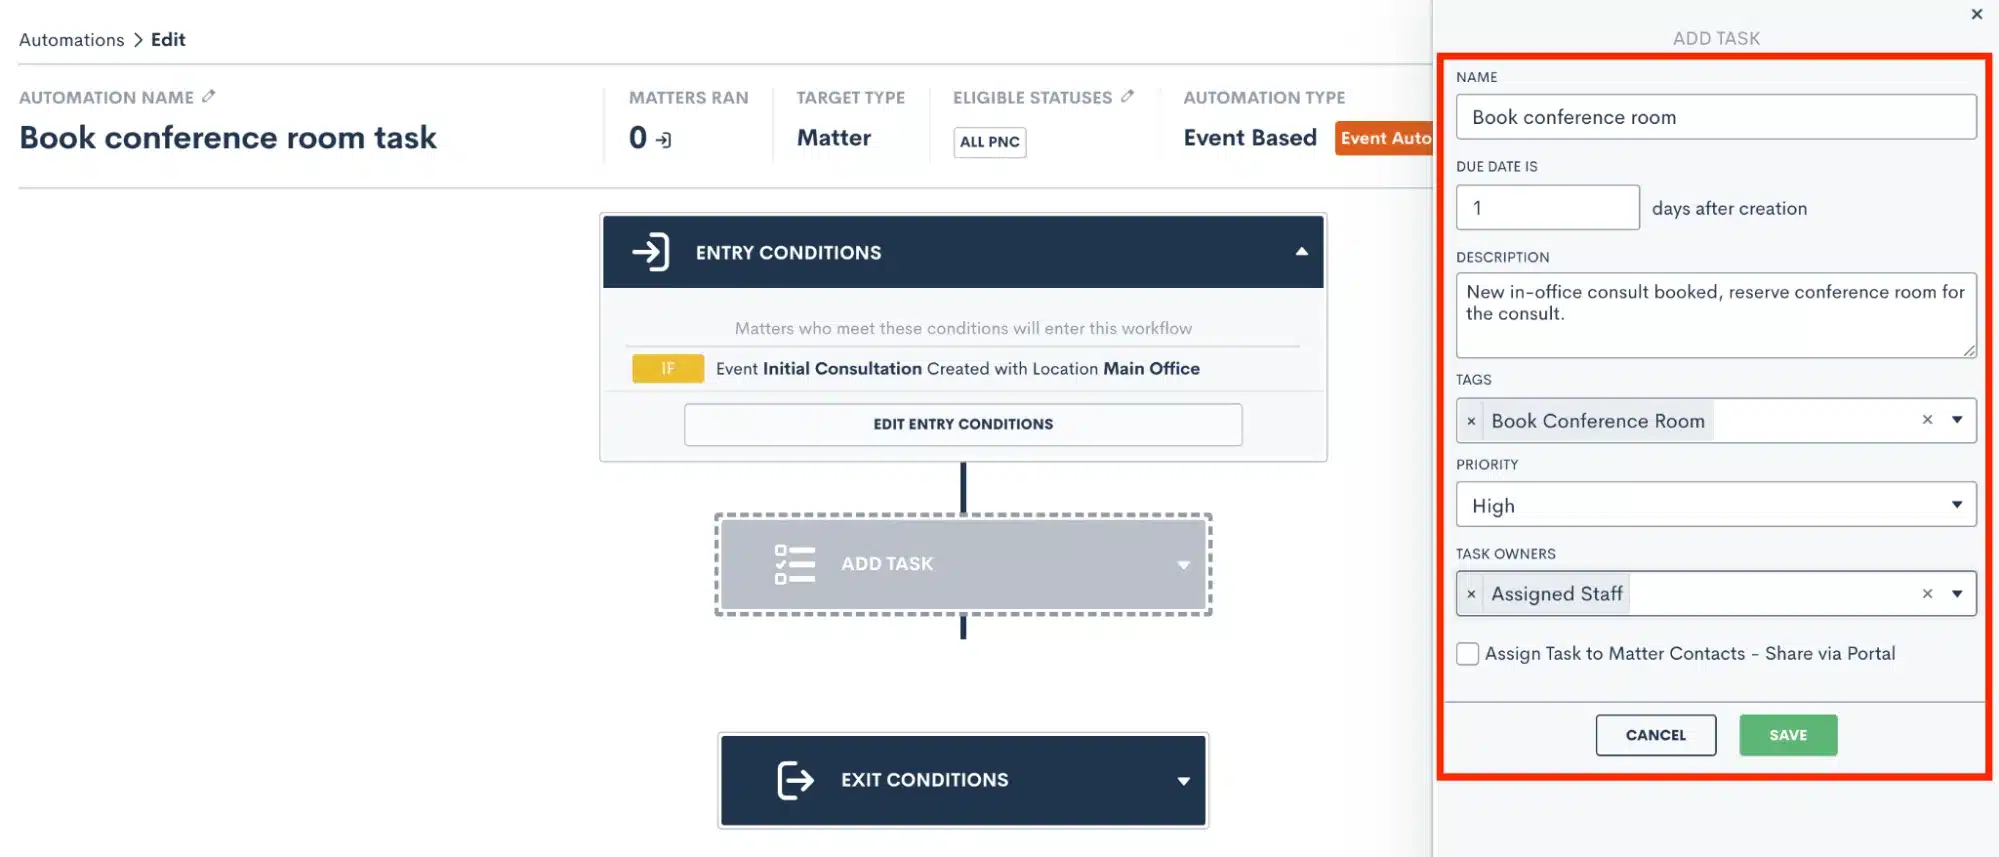
Speaking of assigning Tasks automatically, this is easily accomplished by using the Add Task action item. When this item is selected in an Automation, you will make the same selections on the right sidebar that you would make when manually creating a Task.
This includes the Task name, due date, Task owner etc. While there may sometimes be a use-case for manually creating tasks as a one-off, we strongly recommend using Task automation whenever possible. This is a great way to reduce spent time on tedious Task creation, and streamline each step in your process as a template.
Typically Tasks are used to assign action items to users within your firm, but Tasks can also be shared directly to a Client’s Portal via automation. We’ll dive into this deeper in our power features section below.
Examples
Now that you know the basics of Task automation, let’s discuss a few examples of how you may use this in your process.
- Trigger an Automation when a client submits a Form or uploads Documents, automatically assign a Task to review what has been submitted
- When a client is ready to receive a fee agreement, trigger a Task for the appropriate staff person to preview and send the document out for e-signature. For full automation, template your Document thoroughly and avoid the step of previewing the Document and simply send it directly from the Automation.
- Are there any manual steps in your process that must be done physically outside of your CRM? Use Lawmatics to trigger a templated sequence of Tasks helping to ensure that these items are all accomplished in a timely manner.
Task Power Features
Tasks are extremely useful to your practice no matter how you go about implementing them into Lawmatics. All of the elements of Tasks discussed so far are fantastic ways to use them in your process. Take things to the next level by adding in some (or all!) of these Task power features.
Comments
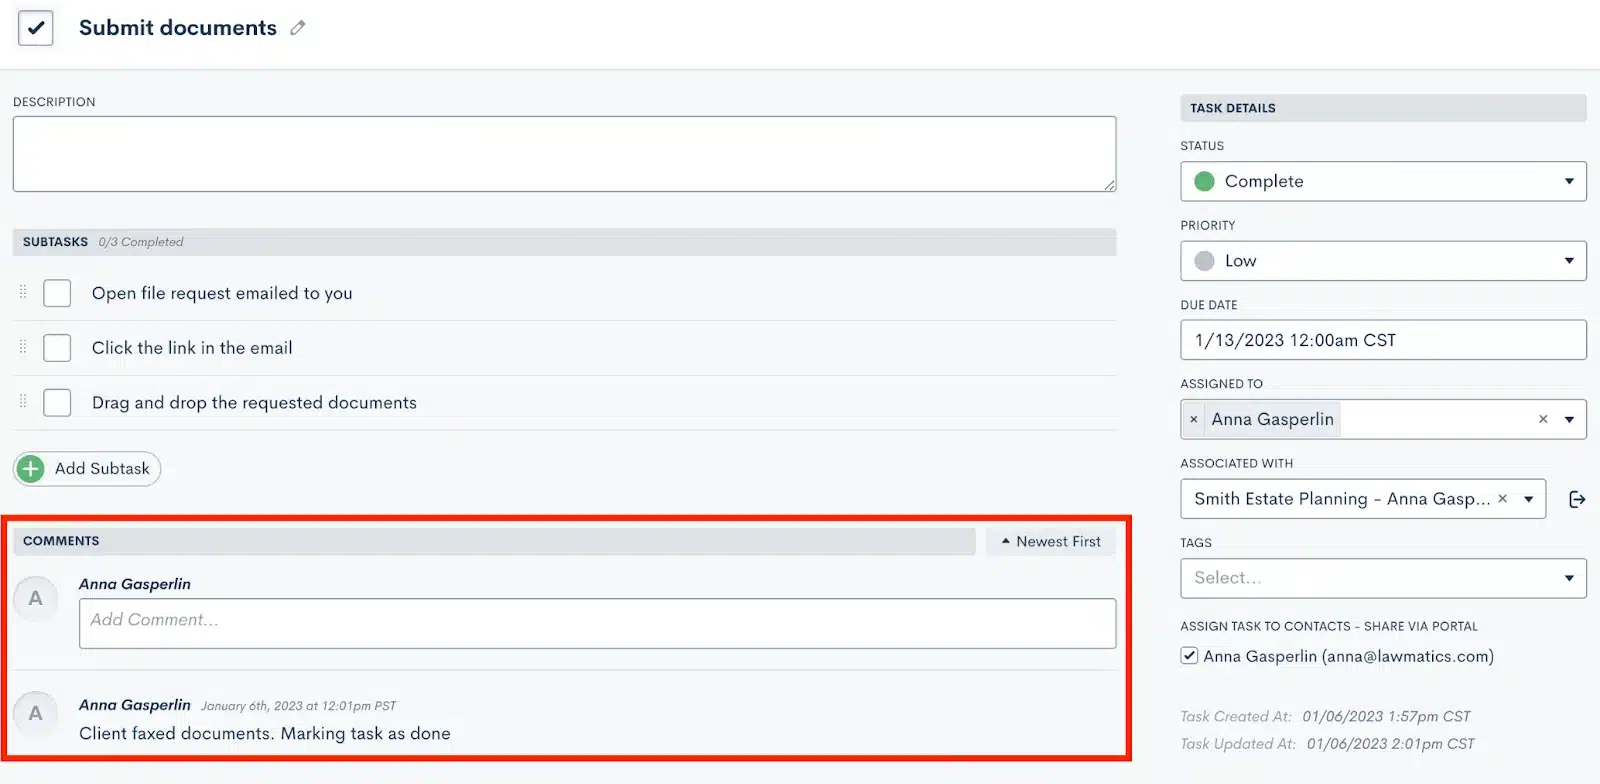
An exciting new feature, Lawmatics now gives users the ability to comment on Tasks. The system will automatically keep track of the date and time of the comment, along with which user left the comment.
To leave a comment, simply click on a Task (or click the edit button). Here you will also see the comment thread history of the Task.
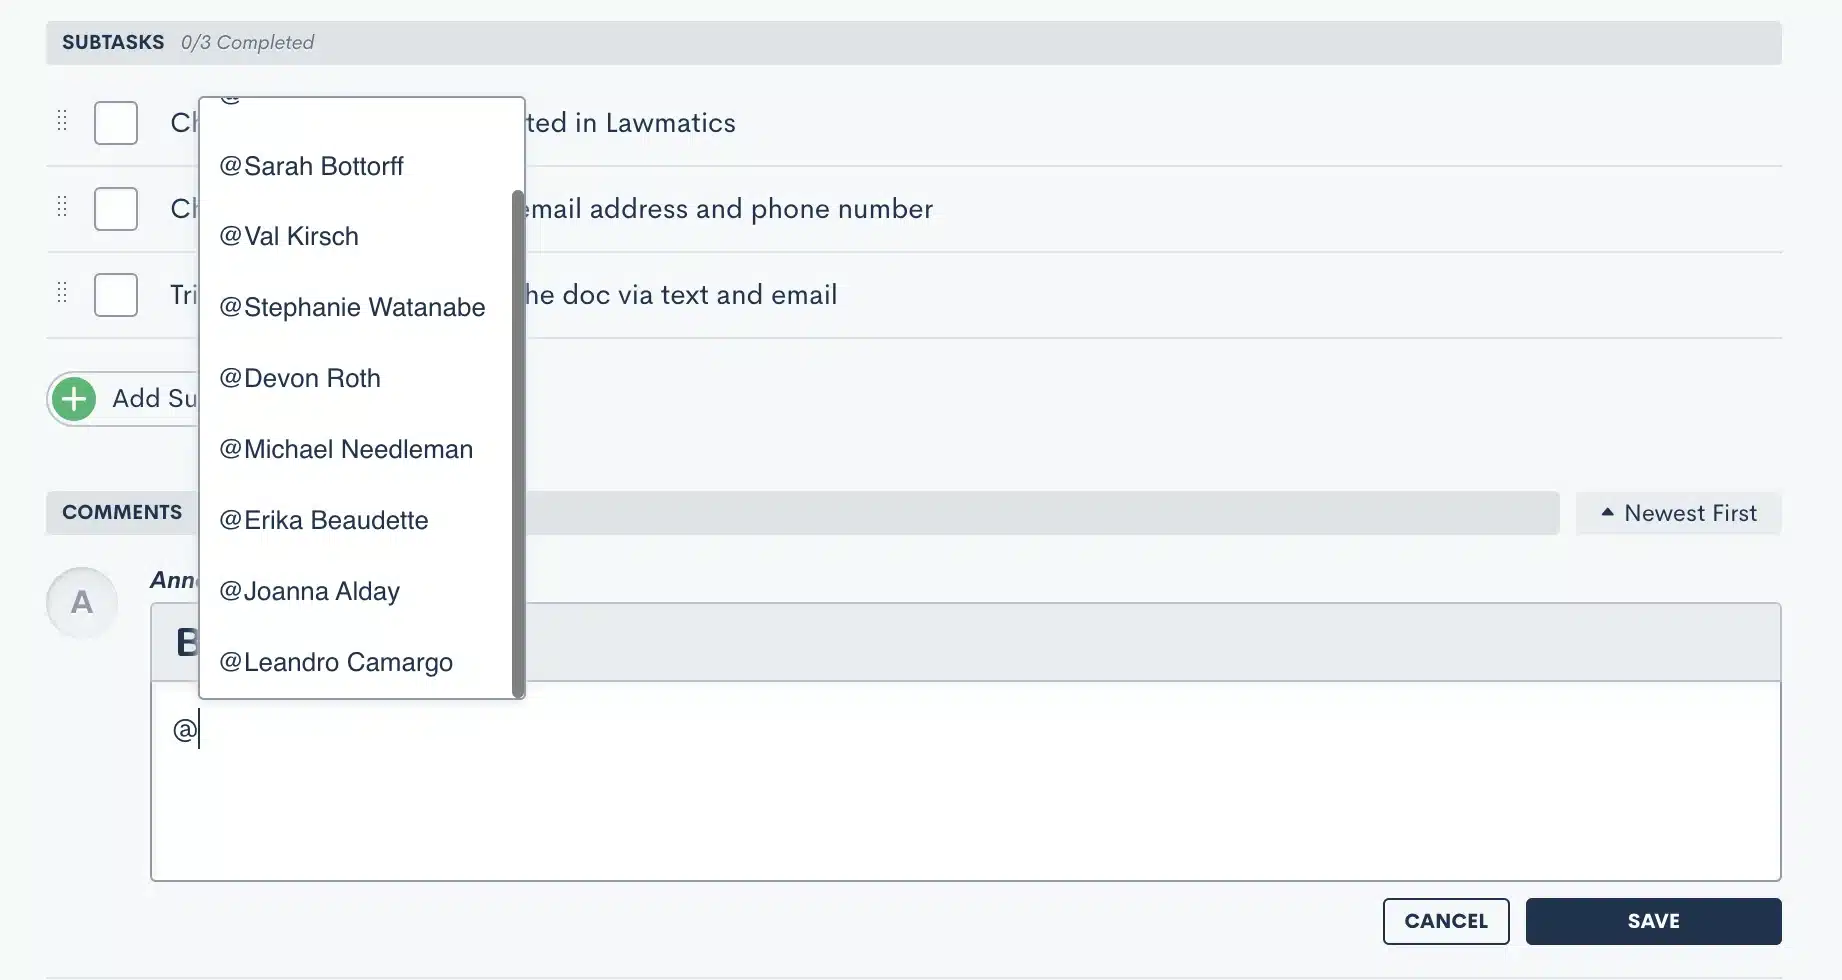
To level up your comments one step further, you can also use the @ sign to alert a particular user within your comment.
Task Notifications
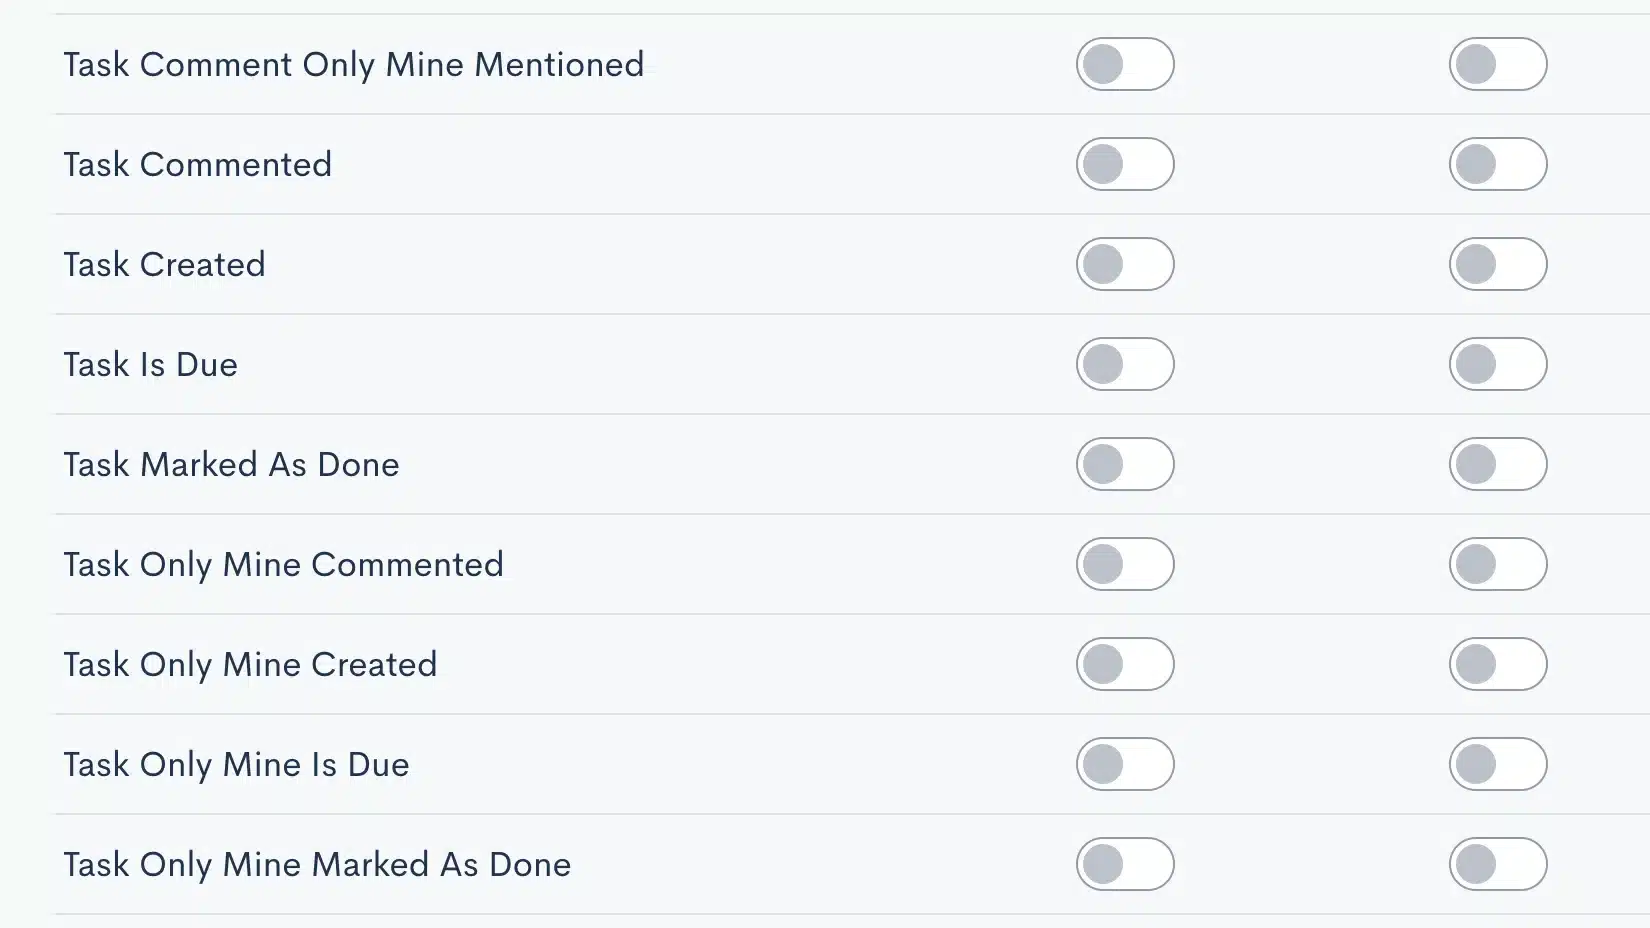
To make sure you and your staff never miss any important Task comments or notifications, we encourage all Lawmatics users to turn on their Task notifications. We are also excited to share some new task notifications along with these new power features.
To turn on notifications, each individual user will navigate to settings, and then select Notifications from the left side menu. Scroll down to locate the Tasks section.
Sub Tasks
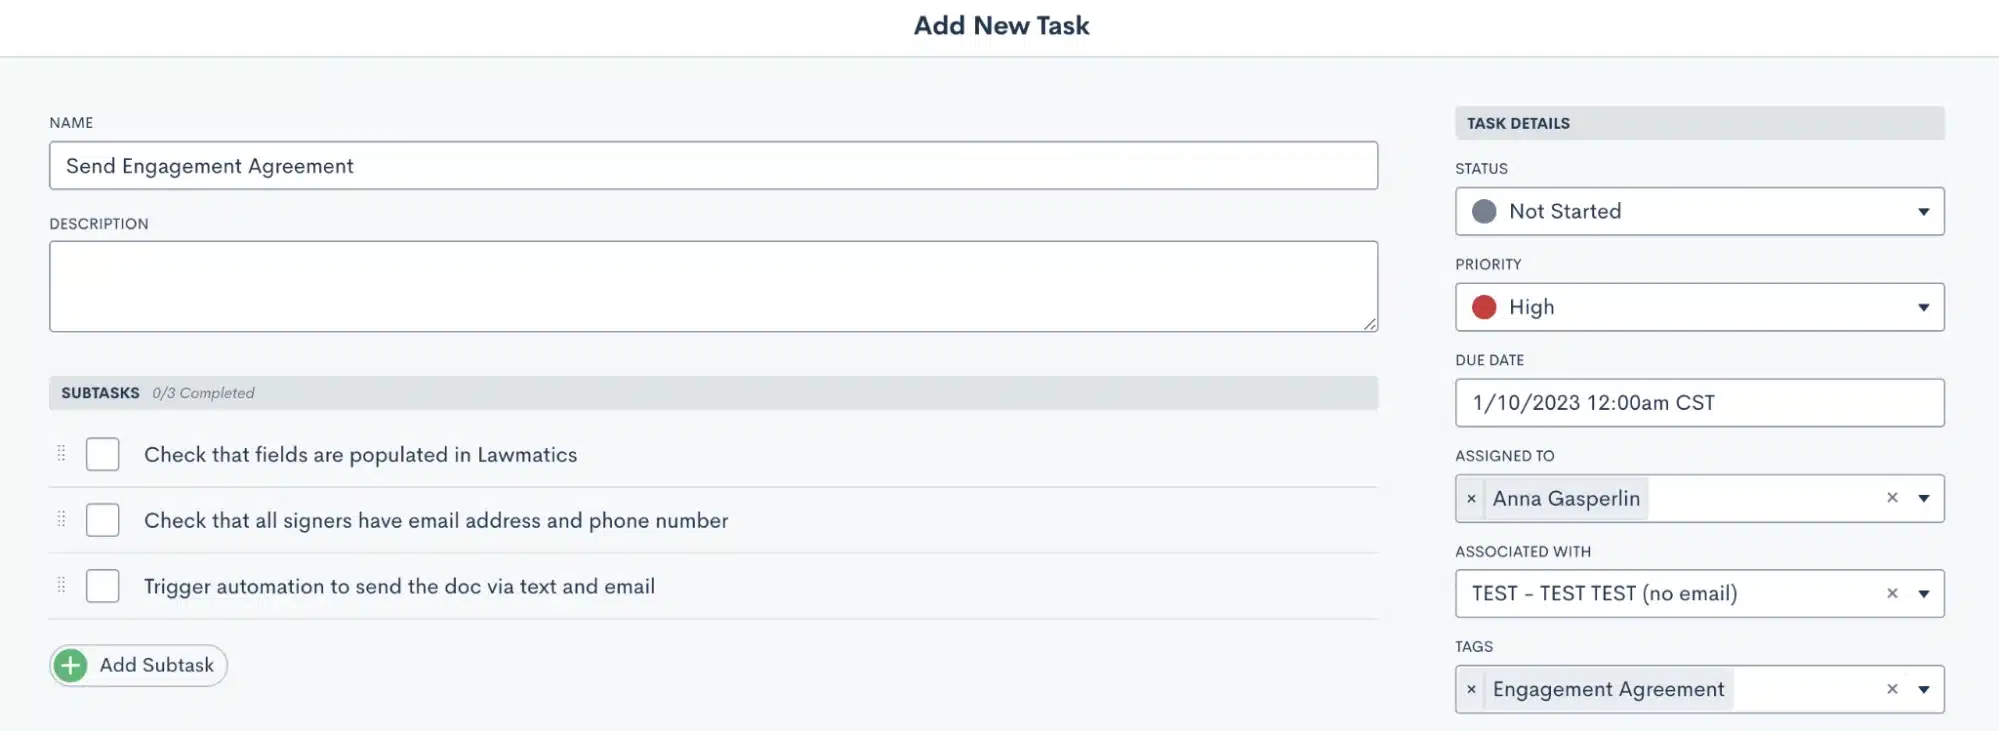
When creating a Task, Lawmatics now gives you the ability to create Sub Tasks within the Task. You will notice the Add Sub Task button any time you are adding a new task, either from the dashboard or a matter’s profile.
These Sub Tasks can be marked as completed independently of one another, as well as of the Task as a whole. Once all sub tasks have been marked as completed, then the Task will automatically be marked as completed as well.
Client Portal
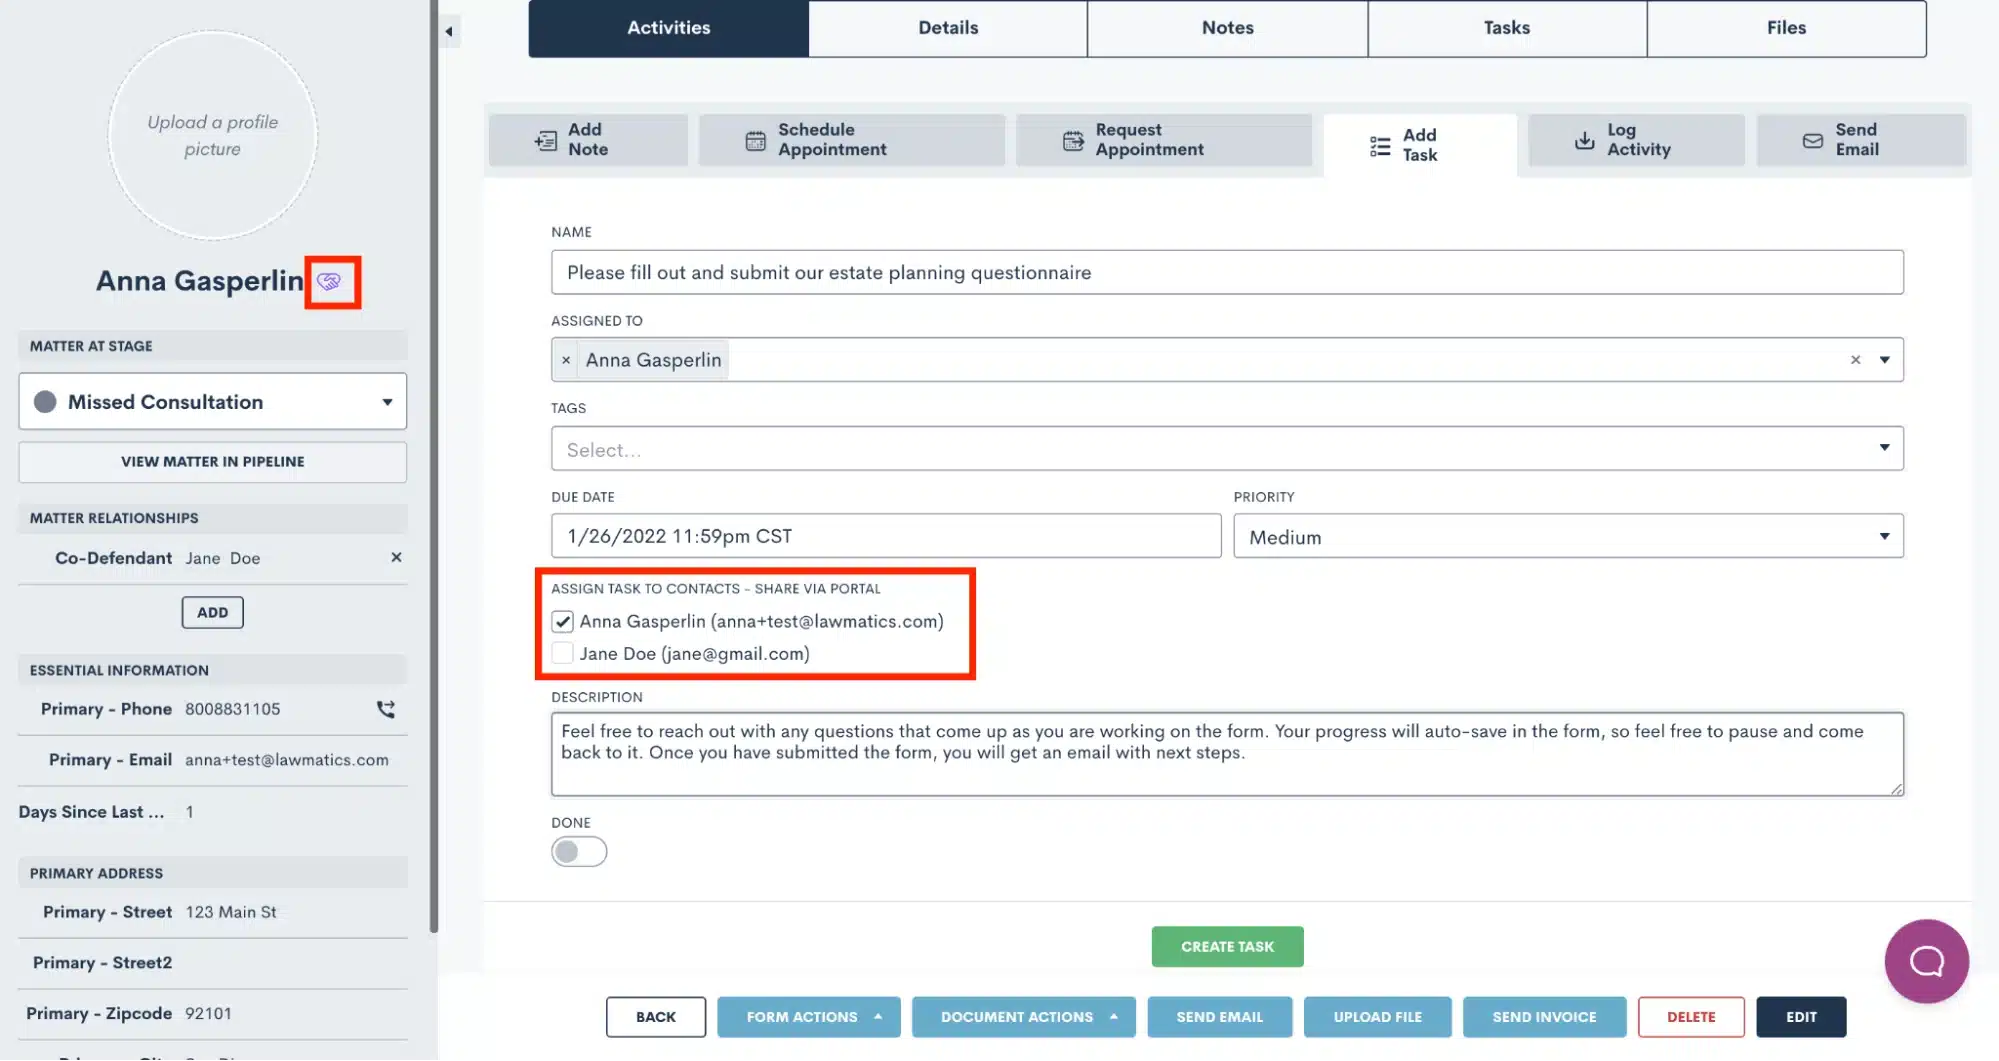
The Client Portal is a powerful tool for sharing Forms, Documents, Appointments, and of course Tasks with your clients. For any Tasks that you wish to assign directly to the client themselves, or to another related matter contact, you can share Tasks via Client Portal.
This can be done directly from a matter’s profile, as shown below, or when creating a task via automation. Make sure that the client has first been given portal access using the button highlighted in red near the top left before selecting to share a task with them.
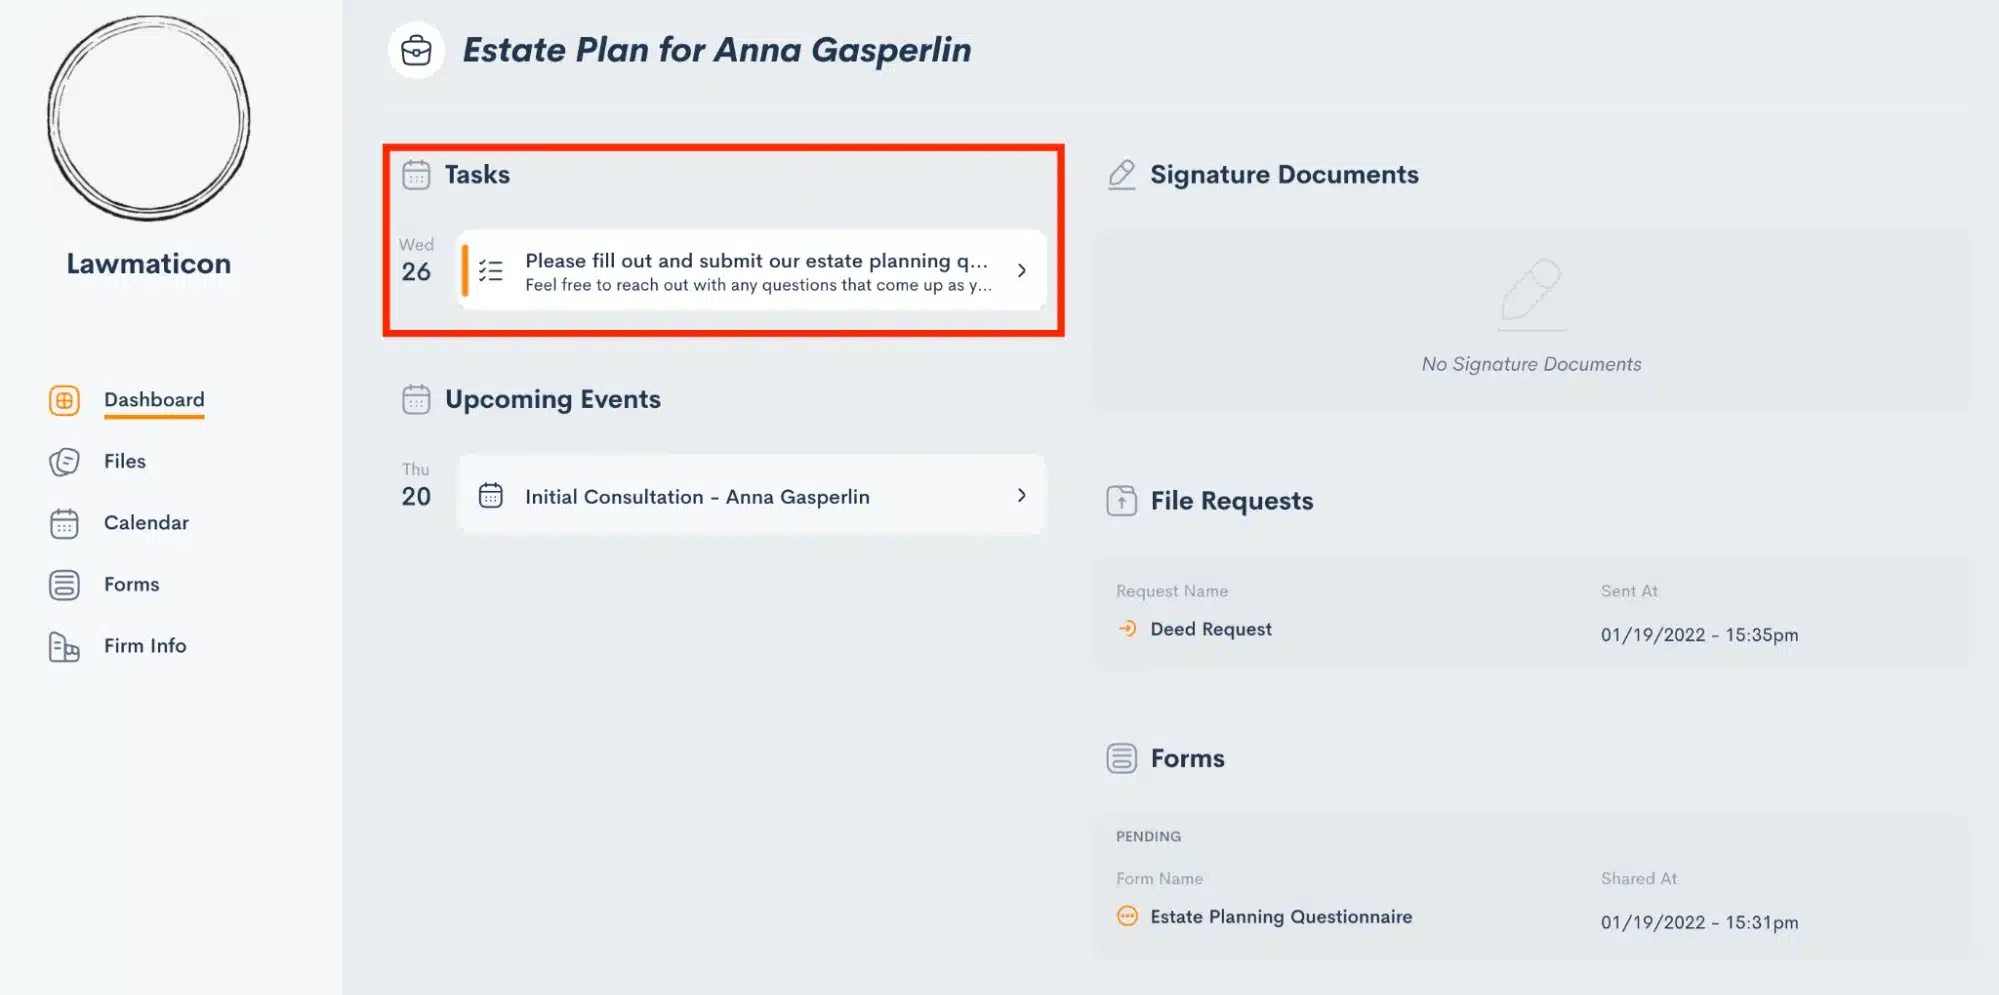
When a client logs in to their Client Portal, they will see a similar page to the one shown below. They can easily view the Tasks you’ve shared with them right in their Client Portal dashboard.
Conclusion
Lawmatics gives you the power to streamline your entire client journey, so why shouldn’t that apply to your internal process as well? Tasks are the key to increased productivity, efficiency, and hopefully happiness within your organization.
Lawmatics tasks allow your team to spend more time on their actual work, and less on the behind the scenes setup and organization of their process. They can simply create their task templates once, and then find them automatically assigned each time they need them.


